Boats generally have a long lifespan, however, over time they can often begin to appear slightly neglected as they endure tough conditions when on the water.
If your boat appears tired and in need of rejuvenation, you may be questioning how you can paint it.
Correct maintenance plays a crucial role in preserving and boosting the appearance of your boat.
Painting a boat can be slightly challenging and demands a lot of time and effort.
The process can differ depending on the boat type.
The majority of boats are finished with Gelcoat with the paint being added to enhance the appearance, alter the color scheme, or patch over any visible flaws that the boat has gathered.
Gradually, the Gelcoat will also start to lose its shine, and paint is used to restore the boat’s natural beauty.
Below, we have identified the basic steps of painting a boat.
Adhering to these simple steps will ensure that your boat is painted (make sure you’re using the correct boat paint and not car paint) perfectly.
How to Pain a Boat – Steps by Step
Step 1
Prepare the Boat
Preparation is the key to a successful outcome.
Before beginning to paint the boat (see which is the best paint for aluminum boats here) you will first need to eradicate any areas of damage that may affect the finish.
Also, sand down any remnants of paint from previous layers and apply a filler to any damaged areas.
Using grit paper will establish the correct textured surface that future coats of paint will adhere to.
If the surface is particularly dirty, you may wish to wash it thoroughly beforehand.
Remove any particles of dust produced by this sanding that may interfere with how well the paint dries.
Also, try to remove as much of the boat’s hardware as possible to eliminate the risk of creases occurring.
If you cannot remove all of the hardware, protect it by covering it with a tape of some kind.
Step 2
Wear Protective Gear
Before attempting any work on your boat, you must ensure that you are kitted out in the correct protective gear.
Many boat products and paints contain toxins and chemicals that can be harmful should they come into contact with your skin.
A visor or safety glasses will protect your eyes from any splashes of paint and flying dust particles that have been dispersed into the air after sanding.
Also, it is recommended that you wear a paint suit of some kind to protect yourself from the paint and your clothing from damage.
Finally, you should wear gloves to protect your hands and arms as this will stop any harmful chemicals from getting onto your skin.
Step 3
Prime the Surface
The next step involves the application of a primer if you deem it necessary.
Apply two to three coats of the primer to all of the surfaces that you are likely to paint.
It is important to select a primer that is compatible with the type of paint that you will be using, otherwise, the product is going to be ineffective in its purpose.
Step 4
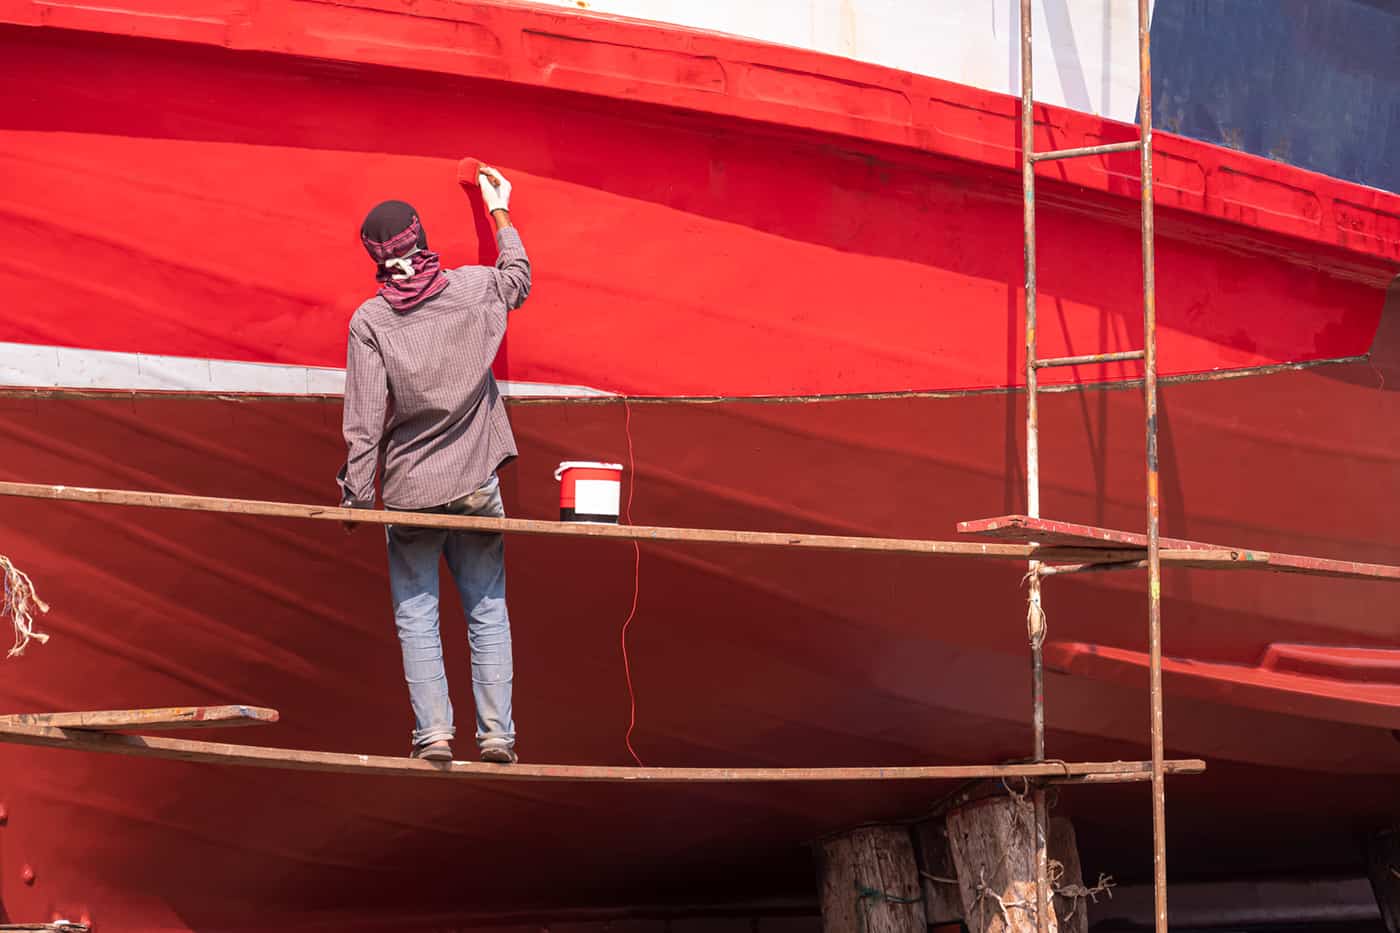
Time to Paint
Now that the surface of the boat has been properly prepared, you can proceed onto the fun part which is of course painting.
Ideally, you should tackle this task in cooler weather because intense heat will not only make it more tiresome for you but will also affect how well the paint clings to the surface.
The number of coats that you apply will be determined by a few factors.
For example, the new paint may be very dissimilar to the original color of the boat so you may need to apply multiple coats to ensure that signs of the original color are not apparent.
Depending on the size of your boat, it may be beneficial to recruit the help of others.
For more expansive surfaces you can use a roller and for more intricate and hard to access parts of your boat you can use a paintbrush.
Step 5
Allow the Layers to Dry
You must allow the coat of paint to dry before adding another.
Failing to do so, presents the risk of the paint smudging and developing streaks.
It is also possible to sand the surface in between coats as this will remove any imperfections and particles that have been left behind by the roller or paintbrush and will also create a smooth surface.
Once each coat has dried you can continue to add further layers of paint.
Step 6
Choosing the Paint
As mentioned, choosing a paint that is compatible with your boat is crucial.
You must also abide by the manufacturer’s instructions that you are provided with as this will ensure that the paint is used correctly.
These guidelines can differ between the different types of paints so it isn’t a case that one universal method of using these paints applies to them all.
Painting Different Boat Types…
Painting a Wooden Boat
When painting a wooden boat, you must choose the correct type of paint that also possesses flexible qualities as this will prevent it from cracking as the planks move.
Oil-based paints are the preferred option because they are more flexible than two-part paints.
The surface will need to be prepared and cleaned following the method that we have mentioned above.
Painting a Fiberglass Boat
The process of painting a fiberglass boat is pretty similar to that of a wooden boat.
However, the most significant difference is the type of paint that is going to be used.
The three most common types of paint for fiberglass boats (see the best wax here) are single part enamel paints, single part polyurethane paints, and two-part polyurethane paints.
Also, rather than applying thick but few coats of paint, you should apply more, thinner coats as this will suit the demands of the fiberglass surface much better.
How to Paint a Boat – Final Thoughts
Painting your boat is a process that requires a lot of work and attention to detail.
Preparing the boat will prove to be crucial to the results that are attained.
Applying the paint directly onto a rough and uneven surface will affect how well the paint adheres.
You must also ensure that you wear the appropriate protective gear as you tackle the task of painting your boat.