Affiliate Disclosure: Some of the links in this post are affiliate links. As an Amazon Associate, we earn from qualifying purchases. Read our affiliate policy for more information.
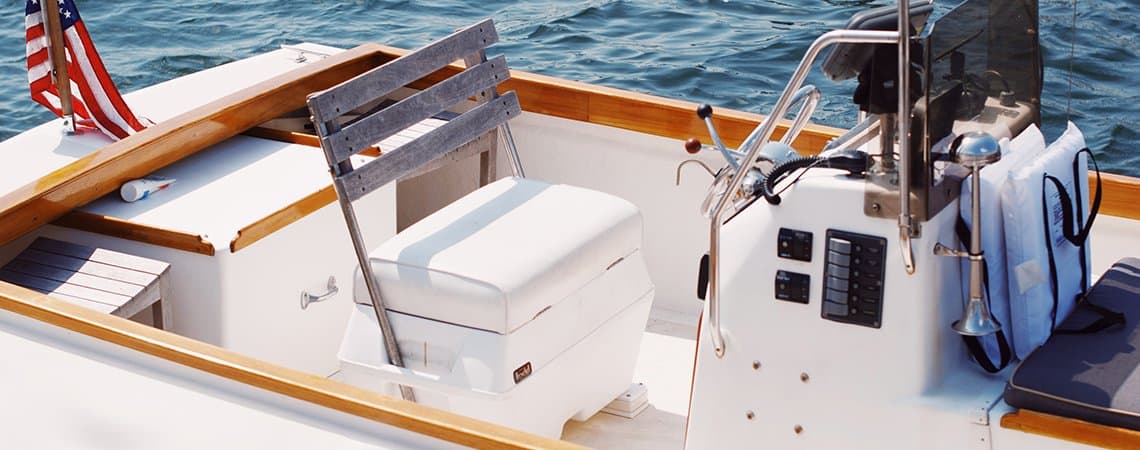
How to Reupholster Boat Seats – All You Need To Know
The topic of today’s guide is how to reupholster boat seats.
Boat seats are typically made of vinyl, which is a fairly delicate material. Vinyl especially suffers if you don’t regularly maintain it.
For this guide, it doesn’t really matter how your seat got damaged. Our tips will help you reupholster a boat bench seat regardless of the damage.
Read on to find out how to properly reupholster and recover boat seats!
How to Reupholster Boat Seats Without Sewing
First up, we’d like to cover reupholstering boat seats without any sewing. Instead of sewing, the method we’ll describe below requires stapling.
You might need to get yourself a stapler for this project, but ultimately, you will complete the job much faster with sewing.
With that, here are step-by-step instructions on boat seat reupholstering.
By the way, the tips below will also help you reupholster boat interiors. The process is more or less the same and should translate to other upholstery well.
1. Take Out and Inspect the Seat
Your primary goal may be to just replace the vinyl cover of your seat, but are you absolutely sure that you won’t need to do anything else?
We’re saying this because you may need to deal with two other pretty serious issues:
- Rotting wood.
- Moist or damaged foam.
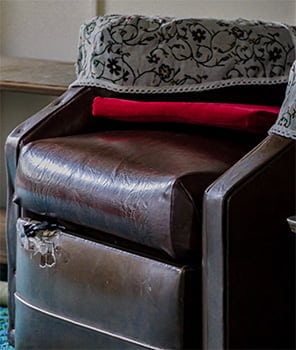
If you do not treat these promptly, then your brand new vinyl cover may meet its demise sooner than you’d want.
Check out the wood beneath and around the seat first – if you see any signs of rotting, then you will need to replace the structure as well.
We won’t cover replacing rotten wood structures here since our topic is reupholstering seats.
Next, you should also probably check the condition of the foam. If the wood beneath the seat is rotten, then it’s likely that some moisture has made it into the seat as well.
If you won’t be using the seat until the upholstery replacement, then you may open it up and check the foam. If it seems fine, then you don’t need to replace it.
2. Measure the Vinyl and Foam
You will need to make sure that your new vinyl cover and foam padding have the same size as your old ones. With that in mind, you should remove your seat’s current cover and, if necessary, the foam filling.
To take your seat cover off, you may need to remove staples from underneath the seat. Look around the seat to determine how the cover is fixed to it.
Once you remove the old vinyl, lay it out flat and measure it. If the foam filling needs replacement too, measure it as well.
3. Get the Necessary Supplies
Once you’ve got your seat inspected and measurements taken, you’ll know what to purchase.
Here’s what you will need for sewing-free upholstery replacement:
- Vinyl. The vinyl should be marine-grade and resistant to UV. Regular vinyl is not a good choice since it will quickly deteriorate from moisture and sunlight exposure. A good option should be this vinyl sheet from Bry-Tech Marine1.
- If necessary, foam padding and wood. If you need foam, then this cushion from AK TRADING CO. should be fine. It’s available in a bunch of sizes and has great user ratings.
- Screwdriver.
- Sewing scissors.
- Marking pencils.
- Stapler or carpet tacker.
Once you’ve got all this, you are ready to start the reupholstery project.
One note to make – you may want to get a little more vinyl and foam than actually needed. This will allow for more room for error – if you misjudge the size of the old cover or damage the new one during installation, you’ll be able to just cut more new vinyl.
If your budget is limited, then you should obviously only get exactly as much material as you need, but you’ll have to be extra careful.
4. Cut Vinyl and Foam Using Your Measurements
Using your measurements, cut the necessary amount of vinyl and foam.
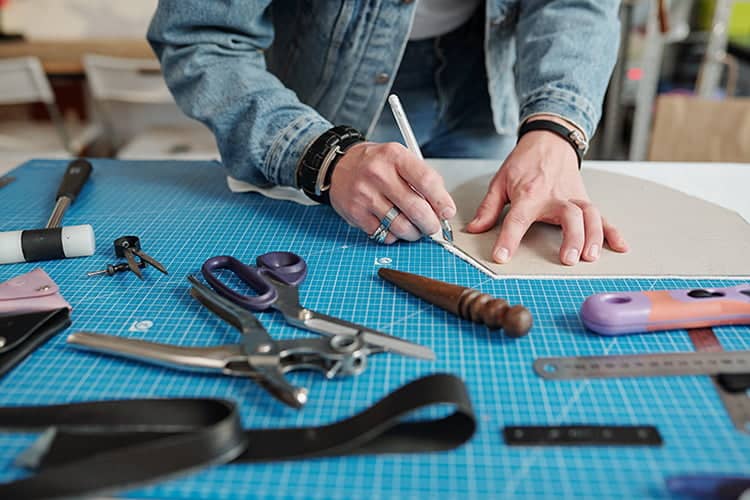
When cutting the vinyl, you may place the old vinyl cover on top of the new sheet and make a trace around it with your marking pencil. Then, cut a vinyl piece of required size and shape.
With foam, you may cut a little bit more to impart the seat a cushier feel. But do not overdo it – if you take too much foam, you may struggle with stuffing it into the seat.
If your foam is very thick, scissors may not be able to cut it. Use an electric knife instead.
5. Start Assembling the Seat
Once your vinyl cover and foam filling are ready, you may start assembling the seat.
Place the vinyl on a flat surface. Lay the foam onto the cover and on top of it the seat base. Make sure that the foam is centered on the vinyl cover.
6. Attach the Vinyl Cover to the Seat Base
Grab the front of the vinyl cover and pull it up and over the seat’s wooden base. Stretch the vinyl as tight as you can to make sure that it sits snugly against the foam.
Next, take your stapler and start attaching the vinyl to the wood. Punch in 4 staples for starters – this will allow you to fix the vinyl in place and avoid wrinkling. Then, staple the rest of the cover with a spacing of 1-2 centimeters.
Once you are done with the front, move to the back and repeat the same. Finally, staple the sides of the vinyl cover, again using the procedure we described earlier.
7. Apply Vinyl Protectant to the Cover
After everything’s stapled in place, your new seat is ready for use! Well, almost, because you should apply some vinyl protectant to it.
One good option is the 303 Products Marine & Recreation Aerospace Protectant. This protectant blocks out UV, as well as prevents cracking and premature aging. It should also impart an attractive shine to your new cover.
Do You Really Need to Replace Your Boat Seat Upholstery?
Now, the procedure that we’ve described is fairly involved, and it requires some sizable investments. With that, some people might not be willing to fully replace their boat seats’ covers.

Well, if your upholstery is only slightly damaged, then you may actually get away without reupholstering. Instead, you may purchase a boat seat repair kit and restore your seats.
This option is only viable if your boat seats are in great condition or are relatively new. In these two cases, replacing the entire vinyl cover doesn’t make much sense.
You may recover boat seats with a vinyl repair kit fairly easily. Below, we’ll have a look at a few boat upholstery kits to help you get started. And then, we’ll provide you tips on using repair kits (although fabric repair kits usually come with their own instructions).
Can a boat upholstery kit help you?
The purpose of a repair kit is to mask the damaged fabric area. Fabric repair kits work best when the tear is really small. Even the best repair kits out there will not be able to cover significant damage.
All in all, whether or not you will be able to make your seat like new depends on a few factors:
- The color of your boat seat cover. Some colors may be very difficult to reproduce.
- The size and location of the tear. Large and long tears will be more difficult to repair and match to the rest of your vinyl seat. Tears located in corners are difficult to treat smoothly too.
- The quality of the repair kit. Some repair kits will adhere better than others. Aside from that, some repair kits will match the texture of vinyl better.
- Your skill. A lot depends on you as well. Repairing vinyl seats may require some practice.
The key takeaway from this is that you should repair your boat vinyl seat only if the tear is small. Large, long, or difficult-to-access tears are very difficult to treat. If you think that you will not be able to treat the tear, then you should just replace the cover or buy a new seat.
Our Boat Seat Repair Kit Suggestions
Capable of making your vinyl seat look like new, fabric repair kits can do wonders.
Now, if you have a serious tear, then you may not be able to fully restore your boat seats. But with repair kits, you at least get the chance to bring your boat vinyl seat back to its former luster.
Typically, a vinyl repair kit includes the following supplies:
- Backing fabric to cover the tear.
- Repair compound as an adhesive for the backing fabric. Usually, the repair compound is colored to help you match the appearance of the patch to your vinyl seat.
- Color mixing guide, if there are several colors of repair compound included.
- Tools to help you with mixing and applying the compound to your vinyl fabric.
And here are our 3 boat upholstery kit suggestions to help you get started with your seat repair project.
Coconix Vinyl & Upholstery Repair Kit
The Coconix vinyl repair kit is intended for shades of gray and black, so it should work for most boat owners. Coconix includes 1 white and 2 black tubes of repair compound, which you may mix to get the desired shade.
The included backing fabric is also sized at 10 x 10 inches, so it should work fine for large tears. Alternatively, the large sheet of backing fabric will also deliver multiple uses.
Interestingly, Coconix offers a full refund as well for those who are not satisfied with the repair quality.
This boat seat repair kit is a little expensive for what you are getting though, but among our 3 picks, it has the best user ratings online.
3M Leather and Vinyl Repair Kit
The 3M Leather and Vinyl Repair Kit is remarkable in that it offers plenty of supplies for vinyl repair. You are getting several pieces of backing fabric, as well as repair compound of multiple colors.
The greatest thing about the 3M vinyl repair kit is that it includes 7 colors that you may mix together to get the desired shade. 3M even includes a color matching guide with this repair kit, so getting started shouldn’t be difficult.
The backing fabric comes in several shades too, so matching this kit to pretty much any vinyl seat cover should not be a problem.
What’s also nice about the 3M Leather and Vinyl Repair Kit is that it is very inexpensive. However, this might be because you are getting relatively little repair compound. So you won’t be getting as many uses out of this kit as from the Coconix pack.
FORTIVO Leather & Vinyl Repair Kit
And the third option is this vinyl & leather repair kit from FORTIVO.
The FORTIVO fabric repair kit is intended for shades of white, black, and brown. It includes 3 different shades of brown, as well as white and black. You are getting a color matching guide too to help you correctly mix the compounds.
FORTIVO includes a 10 x 10-inch piece of backing fabric as well, so you should be able to treat any tear.
How to Recover Boat Seats?
If you choose to purchase a vinyl repair kit, then you will find detailed instructions in the package. But generally, here’s how fabric repair kits are used:
- Clean the tear with rubbing alcohol, using a paper towel.
- Cut a patch out of the backing fabric. The patch should be about half an inch larger than the tear.
- If you need to match the color of the repair compound to the color of your vinyl cover, then use the provided color guide to correctly mix the repair compounds.
- With the provided spatula, insert the patch underneath the tear.
- Use the spatula to apply the repair compound to the damaged area.
- Allow the adhesive to dry for some time. How long you should wait may depend on your adhesive.
- Finally, you may dip a Q-tip in rubbing alcohol and buff the area to make it look better.
How Much Does it Cost to Replace, Repair, or Reupholster Boat Seats?
One thing you may be wondering about is how much reupholstering boat seats costs. Moreover, how does reupholstering compare to repair or purchasing completely new seats?
Well, your final choice cost-wise will depend on these factors:
- The condition of your seats. If your seats are not severely damaged, then you could get away with repairing them yourself. Otherwise, you may want to think about replacing the cover or just buying new seats.
- Your budget. If your budget is really limited, then replacing the seats probably isn’t a good option.
- Supply availability and pricing. Can you purchase quality vinyl fabric in your area for a good price? Or can you purchase a decent seat for not too much money? Or maybe having a professional fix your seats would be cheaper? You’ll have to look around your area to find out.
Now, let’s have a look at how much repairing, reupholstering, or replacing boat vinyl seats would cost.
Costs of Repair
Repairing vinyl is the least costly option. Repair kits typically cost from $10 to $30, so if the vinyl is only lightly damaged, you will not have to spend a fortune to restore the look of your boat seats.
Costs of DIY Reupholstering
Here’s how much you should expect to pay for DIY reupholstering:

- Vinyl costs about $20 per yard.
- Foam cushions may cost differently based on size and density. Expect to pay up to $30-$40 for a 72 x 24 x 2-inch foam cushion.
- A staple gun may cost you from $30 to $50.
- If you choose to sew the vinyl fabric, then you may need to purchase an industrial sewing machine. Expect to pay up to $800 to $1,000 for this tool.
In the end, how much your vinyl repair project will cost depends on how much material you need to replace and which tools you choose to use.
Costs of Professional Upholstering
The cost of professional reupholstering services varies significantly depending on where you are. It’s very difficult to tell how much reupholstering in a shop will cost you. In some areas, DIY reupholstering may cost way less, while in others, professional services will be cheaper.
Costs of New Boat Seats
Vinyl seats are available in various shapes and sizes. The cheapest and smallest seats may cost you just $200-$300, while large L-shaped benches may be as much as $1,500. A helm seat will probably cost you up to $500.
You should have a look at local pricing and compare it with how much new seats will cost compared to reupholstering. There’s no universal rule here – in some areas, new boat seats may be cheaper than reupholstering.
How to Reupholster Boat Seats – Final Words
Now, you know how to reupholster boat seats! It’s fairly easy, though you may need to spend quite a bit of money on it.
With that in mind, we suggest that you first look around to figure out your options and costs.
Thanks for reading and make sure to check our other post.
References
- Mitchell Faux Leather – UV Light Resistance Testing for Polyurethane and Vinyl Materials
- SF Gates – Different Grades of Vinyl Upholstery
Last update on 2024-04-27 / Affiliate links / Images from Amazon Product Advertising API
Disclaimers
All product names, logos, and brands are property of their respective owners. All company, product and service names used in this website are for identification purposes only. Use of these names, logos, and brands does not imply endorsement.
It is our policy to make every effort to respect the copyrights of outside parties. If you believe that your copyright has been misused, please provide us with a message stating your position and we will endeavor to correct any misuse immediately.
Some of the links in this post are affiliate links. As an Amazon Associate, we earn from qualifying purchases. This means if you click on the link and purchase the item, we may receive an affiliate commission, at no extra cost to you. This helps us keep this website alive. Learn more here.
Amazon Disclosure
DesperateSailors.com is a participant in the Amazon Services LLC Associates Program, an affiliate advertising program designed to provide a means for sites to earn advertising fees by advertising and linking to Amazon.com. As an Amazon Associate, we earn from qualifying purchases. Amazon and the Amazon logo are trademarks of Amazon.com, Inc., or its affiliates.
Please refer to our Privacy & Affiliate policy for more details.


